Sanitizing your RV’s fresh water system helps address microbial contamination concerns before first use, after storage, or when contamination is suspected. The process typically involves treating the fresh water tank and its connected plumbing, including the lines supplying your faucets and shower.
Before starting, check your RV owner’s manual. Sanitizer concentrations, contact times, and water-heater configurations can vary by model, so your manufacturer’s instructions should always take priority over general sanitizing advice.
TL;DR
- Before starting: Check your owner’s manual, freshwater tank capacity, water-heater arrangement, and fill connections.
- For sanitizing: Use the manufacturer-approved dilution and contact time, circulate the solution through the specified freshwater plumbing, and flush thoroughly.
- For persistent problems: Consider an approved commercial sanitizing method or professional inspection rather than arbitrarily increasing chemical concentrations.
How Do You Sanitize an RV Fresh Water Tank?
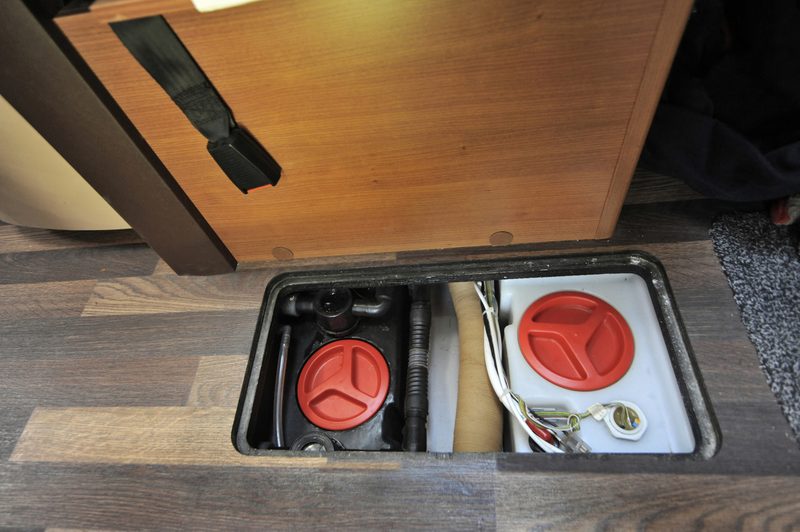
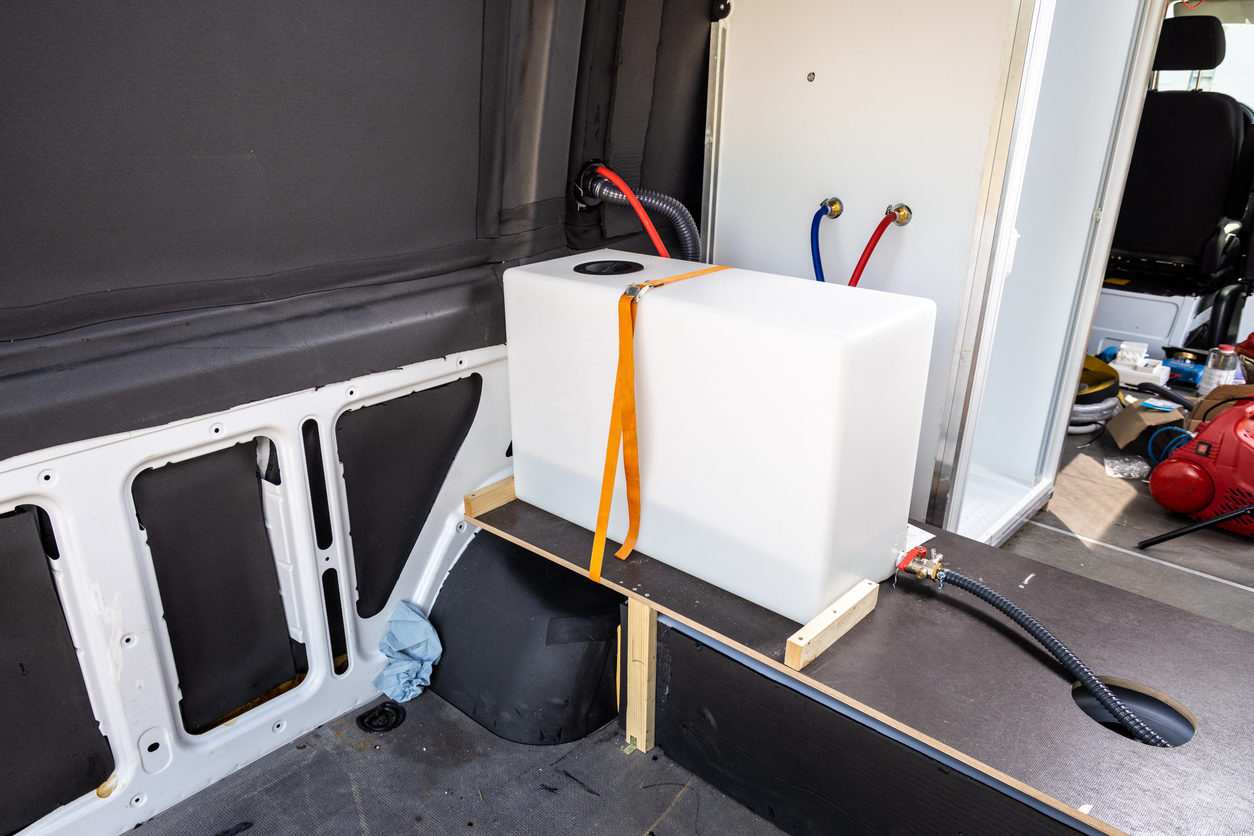
Sanitizing an RV fresh water tank involves draining the system, adding an approved sanitizing solution, circulating it through the plumbing, and flushing everything with fresh water. Follow these six steps, using your RV manufacturer’s instructions for the correct sanitizer concentration and contact time.
- Prepare and drain the freshwater system. Check your owner’s manual, locate the tank drain, and prepare the water heater and filters as directed.
- Measure and dilute the sanitizer. Use the manufacturer-approved sanitizer and dilution ratio for your tank capacity.
- Add the solution and fill the tank. Introduce the diluted sanitizer through the appropriate fill connection, then add water as instructed.
- Circulate the solution. Run the water pump and open the specified faucets, showers, and other fixtures to distribute the sanitizer through the plumbing.
- Allow the required contact time. Let the solution remain in the system for the period specified by your RV manufacturer.
- Drain, rinse, and restore the system. Dispose of the solution appropriately, flush with potable water, restore the normal plumbing configuration, and check that the system operates properly before use.
For detailed instructions, including water-heater precautions, filter handling, and safe disposal, see the detailed step-by-step procedure below.
What you’ll need to sanitize your RV fresh water tank
Gather your supplies before draining the tank. The equipment you’ll need depends on your RV’s freshwater connections and the sanitizing method specified in your owner’s manual.
Essential supplies
- RV owner’s manual: For tank capacity, sanitizer measurements, contact time, and plumbing instructions.
- Fresh potable water: Enough to fill the tank and thoroughly flush the system afterward.
- Approved sanitizer: An RV-compatible freshwater system sanitizer or regular unscented household bleach of the concentration specified by your manufacturer. Avoid scented or splashless bleach.
- Measuring cup and clean container: For accurately measuring and diluting the sanitizer before adding it to the tank.
- Appropriate fill equipment: A clean, compatible way to introduce the diluted solution into your freshwater tank.
- Protective equipment: Gloves and eye protection, as directed by the sanitizer label.
Depending on your RV’s setup
- Potable-water hose: A drinking-water-safe hose for filling and rinsing the tank. See our RV essentials checklist for other useful freshwater accessories.
- Clean funnel: Helpful for adding a diluted solution through a gravity-fill inlet.
- Winterization or siphon kit: May be needed for systems without a gravity-fill opening, provided your RV manufacturer permits that method.
- Compatible tank-fill adapter: For RVs that require a specific connection to fill the onboard tank.
Optional supplies
- Replacement water filter cartridges: Some filters need to be removed, bypassed, or replaced during sanitization. Check our guide to RV water filters for information on different filtration systems.
- Chlorine test strips: Can help check chlorine levels when appropriate for the manufacturer’s procedure. They don’t establish whether water is microbiologically safe.
- Extra freshwater fittings: Spare hose washers, connectors, and protective caps can be useful when filling and flushing the system.
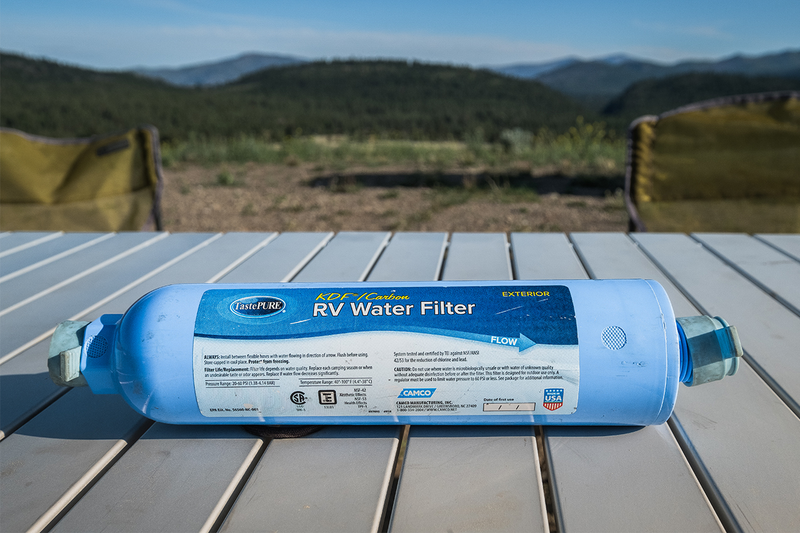
Freshwater sanitizing products worth considering
- RV freshwater sanitizer: Thetford Fresh Water Tank Sanitizer is a two-part product that cleans and sanitizes RV freshwater tanks. It’s an option when compatible with your manufacturer’s instructions, but it isn’t intended as a drinking-water additive.
- Drinking-water-safe hose: A dedicated potable-water hose, such as the Teknor Apex Zero-G drinking-water hose, helps keep your freshwater equipment separate from hoses used for waste handling.
- Replacement water filter cartridges: Choose cartridges designed for your RV’s filtration system. These help restore normal filtration after sanitizing when replacement is required, but they don’t replace the sanitizing process.
SAFETY REMINDER: Never mix bleach with vinegar, ammonia, or other cleaning products. Follow the sanitizer’s label instructions and your RV manufacturer’s procedure.
How much bleach do you need to sanitize an RV water tank?
A commonly recommended formula is ¼ cup of household bleach for every 15 gallons of freshwater tank capacity. Both Winnebago and Grand Design provide examples of this ratio, although their preparation steps and required contact times differ.
The following measurements assume 5% sodium hypochlorite bleach and should only be used when your RV manufacturer’s instructions approve that concentration and dilution.
| Freshwater tank capacity | Bleach using that formula |
|---|---|
| 15 gallons | ¼ cup |
| 30 gallons | ½ cup |
| 45 gallons | ¾ cup |
| 60 gallons | 1 cup |
| 75 gallons | 1¼ cups |
| 100 gallons | About 1⅔ cups |
Why bleach concentration matters: Sodium hypochlorite is bleach’s active disinfecting ingredient. Products with higher concentrations contain more of it per cup, so the measurements above shouldn’t automatically be used with stronger bleach. The CDC recommends regular, unscented household bleach for household disinfection and warns that some splashless and laundry bleach formulations are unsuitable. Its general disinfection ratios are not substitutes for RV-specific instructions.
Example: Sanitizing a 60-gallon freshwater tank
If your RV’s approved procedure uses the formula above, you’ll need 1 cup of 5% household bleach. Following the premixing method described in Winnebago’s 2024 Towables manual, you would dilute that amount in 1 gallon of water, add the mixture to the freshwater tank, and fill the remaining tank capacity with potable water.
The gallon used for premixing is only a way to introduce the bleach. It isn’t the total amount of water needed for sanitization. The diluted solution must be distributed throughout the filled tank and the specified freshwater plumbing.
Other manufacturers may require a different premix volume or procedure. Always follow your RV’s instructions rather than increasing the bleach concentration or shortening the contact time.
How to Sanitize Your RV Fresh Water Tank: Step-By-Step
Sanitizing your RV’s freshwater system involves preparing the plumbing, circulating a properly diluted sanitizer, allowing enough contact time, and flushing the system before use. The steps below cover the general process, but your RV’s owner and component manuals should determine the exact procedure.
Step 1: Prepare the RV and freshwater system
Park your RV on level ground, engage the parking brake, and make sure you have access to a potable-water supply. Locate the freshwater tank drain, low-point drains, water pump, and fill connections before starting.
Drain any existing water from the freshwater tank and plumbing according to your owner’s manual. Close the appropriate drain valves before refilling.
Plan where the wastewater will go. Water discharged through sinks and showers typically enters the gray tank, while the freshwater tank drain may empty directly beneath the RV. Make sure you have sufficient holding-tank capacity or an approved way to collect and dispose of the water.
Work in a well-ventilated area, and wear the protective equipment recommended on your sanitizer’s label.
Step 2: Shut off and check the water heater
Turn off the water heater’s electric and propane heating functions, as applicable. Allow the heater and its water to cool before handling any drain plugs or pressure-relief components.
If your manufacturer’s procedure requires draining the heater, shut off the water supply and relieve pressure using the specified method. Never remove a drain plug from a hot or pressurized water heater.
Next, determine whether your water heater should be bypassed or included in the sanitizing process.
Water-heater decision check: Does your RV manufacturer’s sanitizing procedure require the water heater to be bypassed?
- Yes → Set the designated bypass valves to the bypass position and follow the instructions for sanitizing the connected hot-water lines.
- No, the heater must remain connected → Keep the required valves in their normal operating positions and follow the approved circulation procedure.
- The instructions are unclear → Check the water-heater manufacturer’s documentation or contact an RV service professional before continuing.
This distinction matters. For example, Grand Design’s 2023 Imagine owner’s manual specifies normal valve positions for its tankless water heater but requires bypassing its six-gallon tank-style heater during sanitization.
Don’t assume your RV uses the same arrangement.
Step 3: Remove or bypass water filters
Check whether your RV has an inline, under-sink, or whole-RV water filter. Your manufacturer may require you to remove the cartridge or activate a filter bypass before sanitizing.
Certain filters, particularly those containing activated carbon, can reduce chlorine in the water. Leaving them installed may interfere with a bleach-based sanitizing procedure.
Follow your filter manufacturer’s instructions for removing cartridges, bypassing filter housings, and replacing any cartridges that shouldn’t be reused after sanitization.
Step 4: Measure, dilute, and add the sanitizer
Confirm your freshwater tank capacity and the bleach concentration or commercial sanitizer specified in your owner’s manual.
Measure the appropriate amount using the approved formula. If your manual specifies the ¼-cup-per-15-gallon method with 5% sodium hypochlorite bleach, refer to the measurement table above.
Dilute the measured sanitizer in clean water as directed before introducing it into the tank.
How you add the solution depends on your RV’s fill configuration:
- Gravity-fill inlet: Use a clean funnel or manufacturer-approved filling method to pour the diluted solution into the freshwater tank.
- Tank-fill connection: Follow the instructions for your RV’s tank-fill valve or utility panel. A city-water connection may supply the fixtures without filling the freshwater tank.
- Winterization or siphon system: Use this equipment only if the manufacturer confirms it can introduce the solution into the intended freshwater system.
Never mix bleach with vinegar, ammonia, or other cleaning products. Follow the sanitizer label and avoid introducing undiluted chemicals into the plumbing unless specifically directed by the manufacturer.
Step 5: Fill the freshwater tank and circulate the solution
After adding the diluted sanitizer, fill the freshwater tank with potable water to the level specified in your RV’s sanitizing procedure. Many manufacturer instructions call for filling the tank completely.
Remember that the initial bleach-and-water mixture is only a premix. For example, diluting bleach in one gallon of water doesn’t mean you’re sanitizing the entire system with one gallon. The solution must be diluted into the prescribed tank volume and distributed through the required plumbing.
With sufficient water in the tank, turn on the RV’s water pump according to your manufacturer’s instructions.
Open the designated fixtures one at a time to circulate the solution, including:
- Kitchen and bathroom faucets, on both hot and cold settings.
- Interior shower fixtures.
- Exterior showers, spray ports, and outdoor kitchen faucets, where equipped.
- Other freshwater-fed fixtures, including the toilet or connected appliances, when specified by the manufacturer.
Allow the solution to reach each required fixture, then close it as directed. Monitor your gray-water capacity while doing this.
Step 6: Allow the solution to sit for the required time
Once the sanitizer has circulated through the required plumbing, close the faucets and turn off the water pump as instructed.
Leave the solution in the system for the manufacturer’s specified contact time.
There isn’t one waiting period that applies to every RV. For example:
- Grand Design’s 2023 Imagine manual: Specifies three hours.
- Winnebago’s 2024 Towables manual: Specifies at least 24 hours.
These differences are why you shouldn’t rely on a general four-to-twelve-hour recommendation without checking your manual.
Record when the contact period begins so you know when it’s appropriate to drain the system. Don’t shorten the process or increase the sanitizer concentration to compensate for limited time.
Step 7: Drain the sanitizing solution responsibly
Once the required contact time has passed, drain the solution using the procedure specified by your RV manufacturer.
Water released through interior fixtures may collect in the gray-water tank. Water released through the freshwater tank drain may require a separate collection or disposal arrangement.
Before draining, confirm that your chosen disposal method is permitted by the local authority or facility operator. Chlorinated water should not be discharged indiscriminately onto vegetation, into storm drains, or into streams and other waterways.
If you need a wastewater facility, use Campendium’s RV dump-station map to find nearby options. Check location details and recent camper reviews, then contact the facility to confirm that it accepts the type and volume of wastewater you’re disposing of.
Remember: A dump station that accepts RV black and gray water isn’t automatically approved to receive every sanitizing chemical or freshwater tank discharge.
Step 8: Refill and flush the freshwater system
After draining the sanitizing solution, close the appropriate drain valves and refill the freshwater tank with clean potable water.
Turn on the water pump and flush the specified hot and cold fixtures, including exterior connections, according to your RV’s instructions.
Some manufacturers recommend repeating the fill-and-flush cycle until the chlorine odor is no longer noticeable. Others may specify additional rinsing or testing procedures.
Continue until you’ve completed the manufacturer’s requirements.
Keep enough water in the tank throughout the process. Running the water pump dry can damage it, so switch it off when the tank empties and refill before continuing.
Dispose of the flushing water through an approved arrangement, just as you did with the original sanitizing solution.
Step 9: Restore the system and check before use
After completing the flushing procedure, return the RV’s freshwater system to its normal operating configuration.
Before using the water for drinking or cooking:
- Return water-heater bypass valves and tank-fill controls to their normal positions, as directed.
- Reinstall or replace water filter cartridges according to the filter manufacturer’s instructions.
- Check that drain valves, fittings, and plumbing connections are properly secured.
- Restore water pressure and check faucets, showers, and exterior fixtures for normal flow.
- Inspect accessible plumbing connections and filter housings for leaks.
- Complete any additional flushing, checks, or testing specified by your manufacturer.
Check for persistent odors, discoloration, or other unusual water conditions. If problems remain after the approved sanitizing procedure, stop using the water for consumption and consult a qualified RV technician or appropriate water-testing professional.
A lack of chlorine odor or a normal reading on an ordinary chlorine test strip doesn’t guarantee that the water is free of harmful microorganisms. Follow your manufacturer’s guidance to determine whether additional testing or service is needed before the freshwater system is ready for use.
How to sanitize an RV fresh water tank without bleach
You can sanitize an RV fresh water tank without household bleach, provided you use a disinfecting sanitizer approved for your RV’s potable-water system. Some RV-specific products offer bleach-free alternatives, but check their labels carefully. A product that removes odors or buildup doesn’t necessarily disinfect the tank and plumbing.
| Method | Best suited for | Important limitation |
|---|---|---|
| Manufacturer-approved bleach procedure | Routine sanitization when specifically recommended | Correct concentration and contact time matter |
| RV-specific disinfecting sanitizer | RV owners seeking an approved bleach-free alternative | Must be suitable for the particular potable-water system |
| Tank cleaner or deodorizer | Removing buildup, unpleasant tastes, or odors | May not provide disinfection |
| Vinegar-only rinse or treatment | Certain manufacturer-specified cleaning or odor-removal steps | Not a substitute for a validated sanitizing procedure |
When choosing a bleach-free product, check whether its label specifically claims to sanitize or disinfect potable-water tanks and plumbing. Follow its instructions for dilution, contact time, circulation, and rinsing rather than applying the procedure used for household bleach.
Bleach-free freshwater products worth considering
- Thetford Fresh Water Tank Sanitizer: A two-part, EPA-registered system that first cleans the tank with detergent and then sanitizes its interior surfaces. It’s marketed as bleach-free and is not intended as an additive to drinking water.
- CLEAR2O TankFRESH Water Tank & System Flush: A bleach-free product designed to clean and deodorize freshwater tanks, water lines, and fixtures. Confirm that its labeling meets your manufacturer’s sanitizing requirements before using it as a disinfecting alternative.
For ongoing water quality maintenance, RV water filters can help address sediment, chlorine taste, and certain odors. However, filtration doesn’t replace sanitizing a contaminated freshwater tank or its connected plumbing.
Safety warning: Never mix bleach with vinegar, acids, ammonia, or other cleaning products. Dangerous gases can form. If switching sanitizing methods, drain and flush the system according to the product and RV manufacturer’s instructions before introducing another treatment.
Common RV Fresh Water Tank Sanitizing Problems and Mistakes
If your freshwater system still has an unusual odor or doesn’t seem properly flushed after sanitizing, the problem may involve more than the tank itself. Check the water source, filters, water heater, and plumbing configuration before repeating the procedure.
| Problem | What to check and do |
|---|---|
| Water still smells bad | A lingering chlorine smell may indicate that more flushing is needed. Musty or recurring odors could point to contaminated water, hoses, filters, or plumbing. If only the hot water smells like rotten eggs, check the water heater’s troubleshooting instructions. |
| RV has no gravity-fill inlet | Some RVs use a tank-fill valve, utility panel, or winterization siphon system. Check your manual for the approved way to introduce sanitizer. A city-water connection doesn’t necessarily fill the freshwater tank. |
| Unsure whether to bypass the water heater | Tank-style and tankless heaters can have different sanitizing requirements. Check both your RV and water-heater manuals before adjusting the bypass valves. Never assume another RV’s configuration matches yours. |
| Suspected mold or heavy buildup | Sanitizing may not remove accumulated sediment, slime, or other physical deposits. Follow the manufacturer’s recommended cleaning procedure before sanitizing. Persistent contamination or inaccessible buildup may require professional service. |
| Only uses campground city water | Connecting directly to city water often bypasses the freshwater tank, leaving stored water unused. The tank and connected plumbing still need maintenance according to the manufacturer’s schedule. Our RV campsite setup checklist covers proper potable-water hose connections and campground hookups. |
| Sanitizer won’t rinse out | Drain and refill with potable water, then flush every fixture specified in your manual, including exterior connections. Check valve positions and repeat the flushing procedure as directed. If the chemical taste or odor persists, seek professional advice before using the water for drinking. |
Avoid increasing the bleach concentration to fix persistent problems. Stronger chemicals won’t necessarily remove buildup or resolve contamination. Never mix bleach with vinegar, acids, or other cleaners.
If you suspect the water remains contaminated after completing the approved procedure, stop using it for drinking or cooking until the problem has been assessed.
Frequently Asked Questions
Regular unscented household bleach is commonly recommended when used according to the RV manufacturer’s instructions. An RV-specific sanitizer labeled for potable-water systems may also be suitable. Check the product’s sanitizing claims, concentration, compatibility, and contact time before choosing.
A commonly cited formula is ¼ cup of household bleach per 15 gallons of freshwater tank capacity. For example, a 60-gallon tank requires 1 cup using this formula. Use these measurements only when your RV’s approved procedure specifies the ratio and the appropriate bleach strength, such as 5% sodium hypochlorite.
Choose a bleach-free sanitizer specifically approved for your RV’s potable-water system. Follow the product’s instructions for measuring, circulating, soaking, draining, and rinsing. Make sure it is labeled for sanitizing rather than merely cleaning or deodorizing.
It depends on the water heater and your RV’s plumbing configuration. Some procedures require bypassing the heater, while others involve circulating sanitizer through it. Check both the RV and water-heater manuals before changing valve positions or introducing chemicals.
Sanitize the freshwater tank and the connected plumbing specified by your manufacturer. This commonly includes hot and cold water lines, faucets, showers, and exterior fixtures. Treating only the tank may leave portions of the water system untreated.
Drain the sanitizing solution, refill the tank with potable water, and flush the specified fixtures. Repeat the process as directed until the manufacturer’s rinsing requirements are met. If a strong chemical odor or taste persists, seek professional advice before drinking the water.
Use an approved wastewater disposal method that accepts the sanitizer and water volume involved. You can find nearby RV dump stations on Campendium, but confirm acceptance with the operator first. Avoid releasing chlorinated water into storm drains, waterways, or vegetation.
Sanitize before first use, after extended storage or winterization, and whenever contamination is suspected. Follow your manufacturer’s recommended maintenance schedule for routine sanitization. If you’re preparing for camping season, use our RV dewinterizing guide to check the rest of your RV’s systems before traveling.
Plan Your Next RV Trip With Campendium
Once your freshwater system is sanitized and ready, it’s time to prepare for your next trip. Explore campgrounds on Campendium to compare water hookups, RV amenities, and recent camper reviews before choosing where to stay.
You can also find RV dump stations along your route to plan necessary service stops. Confirm potable-water availability and dump-station access with each facility before traveling.